DANCING RAVEN STUDIO
  • Home
  • Blog
  • Artist
    • Press
    • Exhibitions and Awards
    • Recently Sold
  • Youtube Videos
  • Art
    • Birds
    • Flowers
    • Still Life
    • Eclectic
    • Art Quilts
  • MY STORE
    • Shawna's Society6 Store
    • Canvas Prints
    • Available Original Paintings

Ptarmigan Colour Study using Colourful Whites

12/23/2022

0 Comments

 
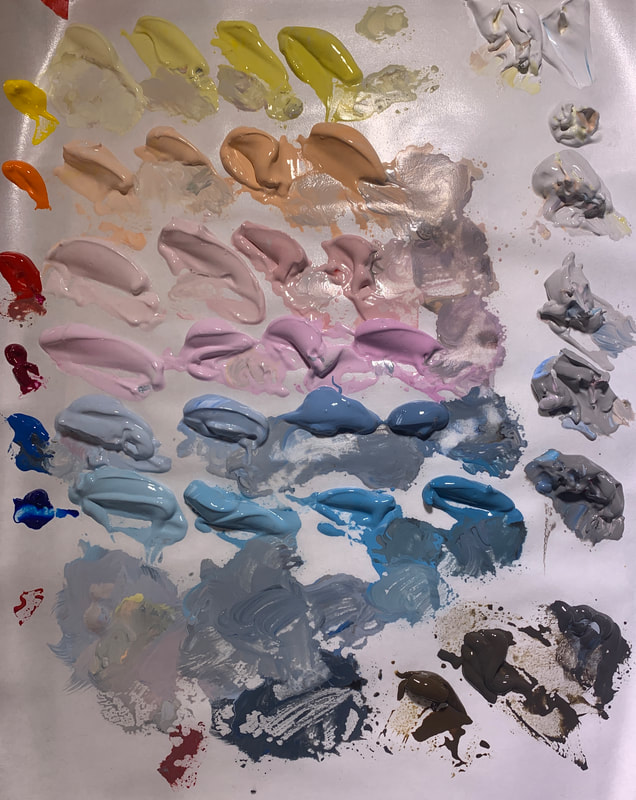
The first colour study that I started, after an hour I abandoned it. Right away I could see that the Light values were too dark, and all the colours were far too chromatic.   
Picture
Before I began the second version of the colour study, I changed 3 Light modeling values: Light Light values to 9.5, Middle Light to value 9, and the Dark Light value at 8.5.  The Half Tone which transitions to the shade side is a value 8.
 
As I mix the colours, I add in just enough of the same value of neutralized grey which lowers the chroma creating colours that are more natural.
 
I used 4 colours for the Light part of the Ptarmigan and snow:  Cadmium Yellow Medium, Cadmium Orange, Cadmium Red Medium and Quinacridone Magenta.  I create the 4 values with each of the 4 colours.
 
For the Dark modeling values I chose: Light Dark is Value 7, Middle Dark is Value 6, Dark Dark is Value 5.  I did add in a Value 8 as well to give myself some mixing flexibility. 
 
I chose 2 different blues for the Dark parts: Cerulean Blue and Phthalo Blue (Green).  I used mostly the Cerulean Blue. ​
​A white object is going to have a small range of values that tend towards the lightest part of the value range.  It would be totally weird to use a value 2 in this painting.  This value range is called High Key.  So, in staying up in the higher range of values from 9.5 to value five that should give us enough value range to create the forms. 

When a camera takes a photo, it automatically makes the shadows darker.  Then add in printing and the shadows get even darker.   We must remember that and need to compensate for that bias.  I work to reconcile this understanding by lightning up the shadows.  Always remembering that what my eyes see and what the camera see are two different things.
 
As we are modeling a white object there is a very delicate shift of value as the planes begin to turn away from the light, that is until that terminus line.  Then it is a solid cut-off line. 

Picture
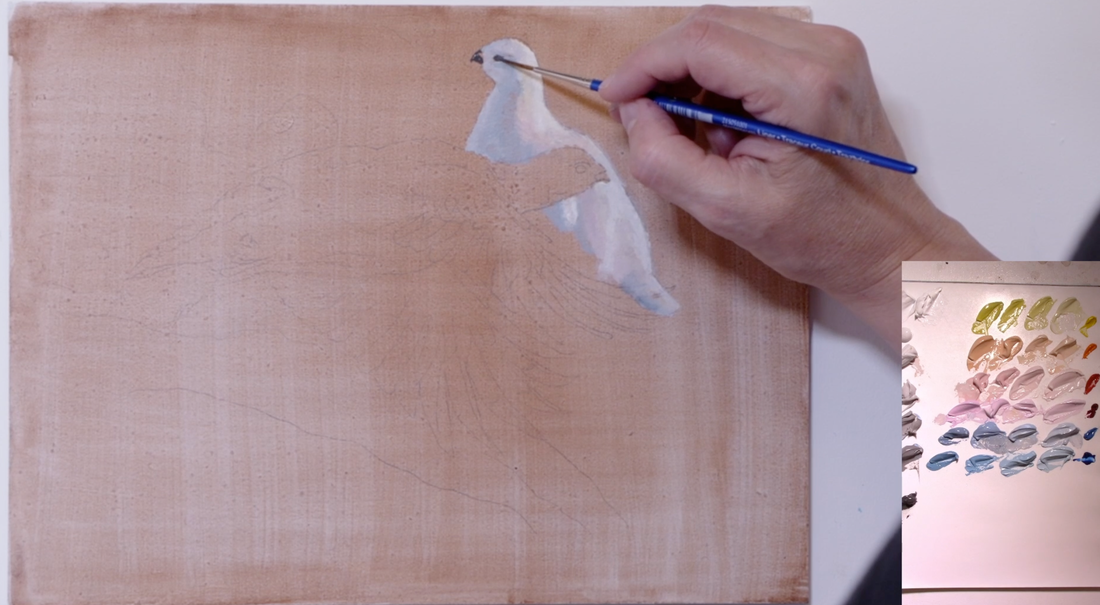
Watching the video on painting a sphere will help in rendering these Ptarmigans. I did a full blog post about the sphere, click HERE.  These birds are rounded objects and the light moves across them in a similar fashion.
Picture
When I work on a colour study, I don't really worry about it being perfect.  My goal is to get value/colour information, which will inform all the decisions that I will make prior to launching into the actual painting.
 
This is not a very big painting is 28 by 20 centimeters (8x10 inches).
 
In this study I started at the birds first.  I think when I go to do the final painting that I will do the background first before moving to the birds.  One thing that is be interesting will be that there are going to be a lot of lost edges. That is what happens when one paints a white bird on white snow.
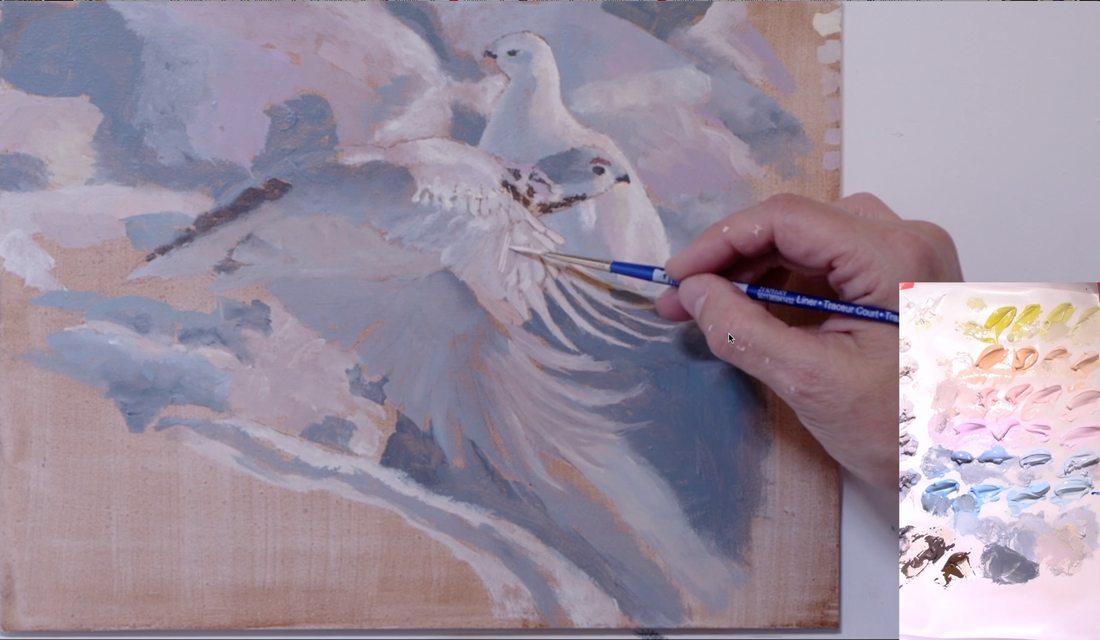
Below is the final painting that I critique at the 18 minute point of the video.  
Picture
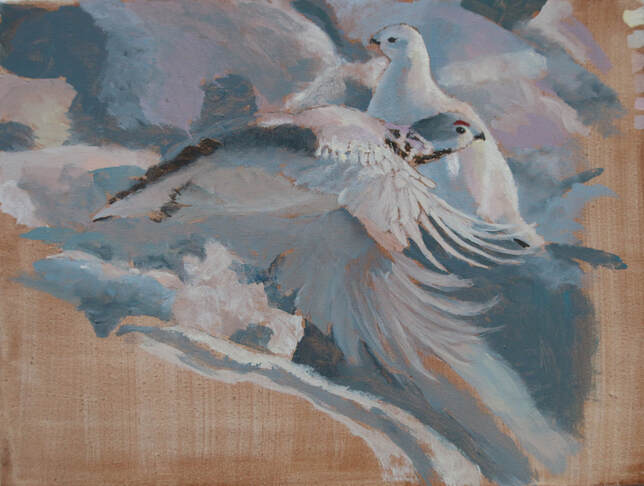
Below are the three adjustment options:
1. lighten the snow in the background
2. darken the snow in the background
3. blur the snow in the background which creates a lot of little bokeh. 
Picture
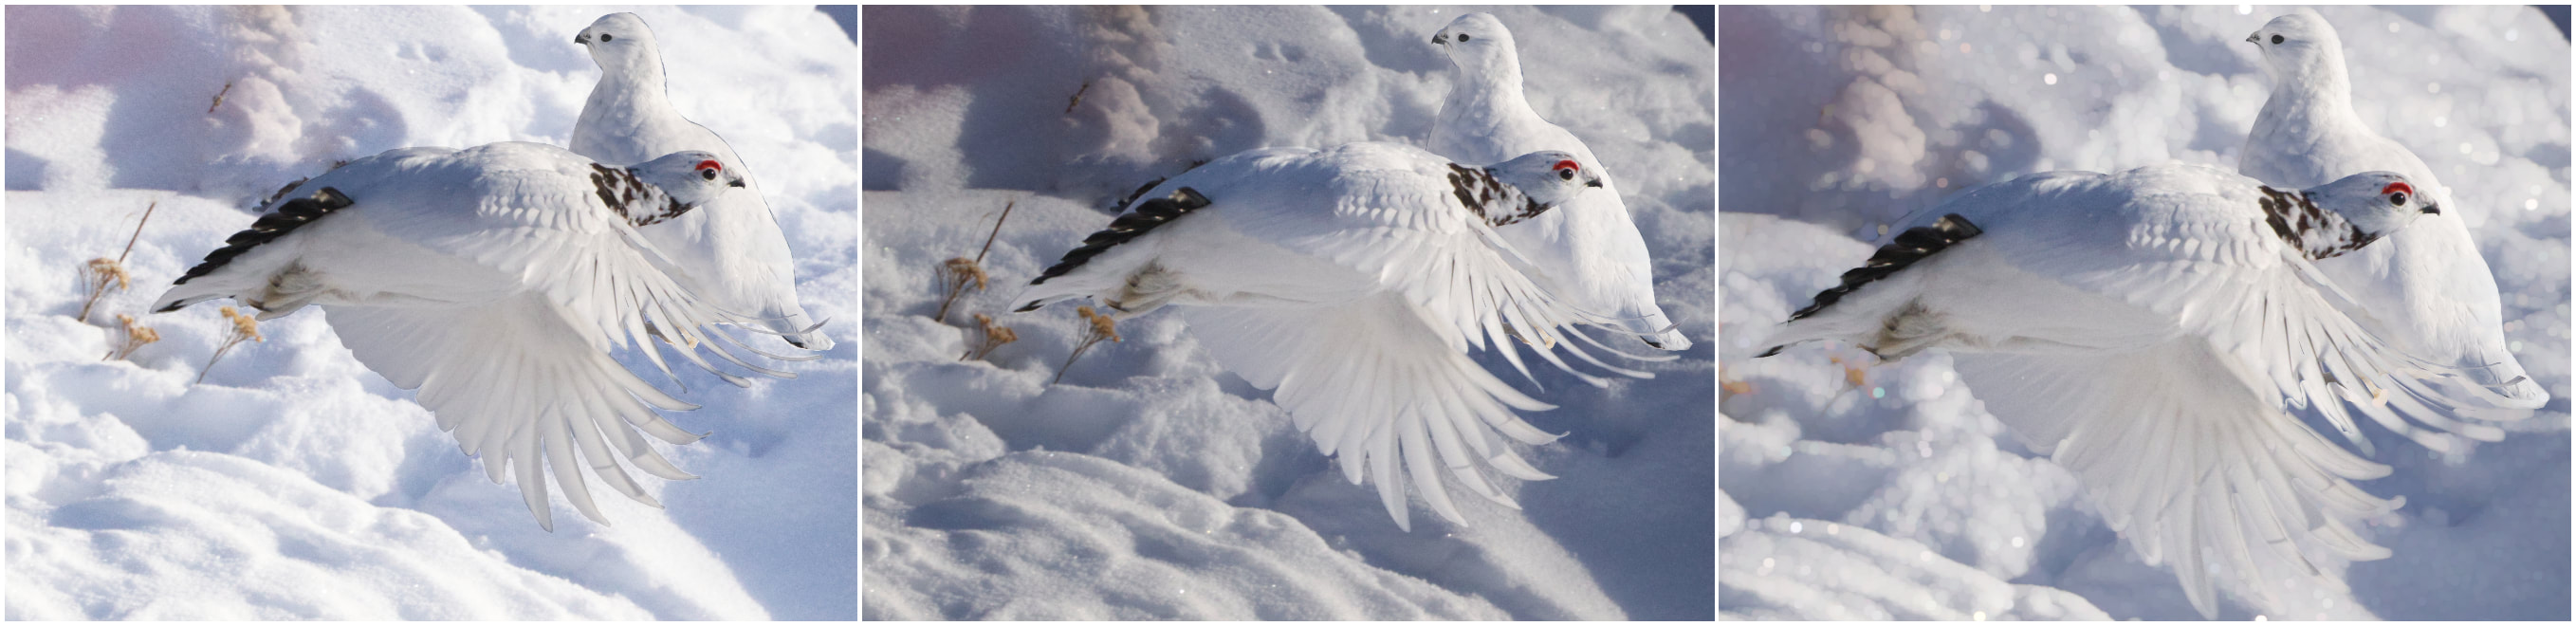
Which one would you choose?  Leave a comment below. 
0 Comments

Photographing White Birds on Snow

12/9/2022

0 Comments

 
This week's video is a tips and tricks one. I am actually going to focus in on how to photograph white birds on snow!   I will be using my friend Astrid Kruse's little ceramic birds that she makes. It turns out that birds are not known for being where you want them to be when you are ready to film. Plus it's really cold outside.  It has been hovering at -30 and colder all week.  

Check out Astrid's work HERE. 

If you figure out what I'm going to paint for the next video put a comment below. :)  I recommend staying to the end of the video as I will be sharing some of the images that I have taken.  Let's grab our camera and let's get going.
Picture
You will notice that my shutter speed is going to stay the same all the way along at 2500.  I don't want that number to change through the whole process. The reason I used 2500 is that I am doing bird photography. Keeping the shutter speed very quick compensates for when they decide to move.  Birds tends to move fast and I want the image to be as clear as possible.
​
What I'll be focussing on when we do this exercise is using  the ISO setting to modify the amount of light coming into the camera sensors.  ISO is the film speed.  In the old days we would get film that had an ISO of 25, 100, 200, 400, 800 and 1600.  But now our digital cameras can have an ISO of 25,000 or higher, which can be amazing for really low light settings but also tends to be "noisy".  First I start with taking an automatic reading to get the cameras light exposure reading.  The moving indicator will land in the centre of the exposure value range which is at that 0. (scale below)
Picture
Picture
When I looked through the back of my camera via the little view finder I see a screen (image to the left).  First there is the shutter speed, then f-stop reading, the exposure value scale and ISO number. I generally like my f-stop to be about 11, 12 or 13, which is mid-range on the f-stop scale. I take advantage if the light is really bright to increase my f-stop reading to 22.  This will ensure that the I get the most in-focused information on the photo.  I only drop my f-stop to a 4 if I want everything to be out of focus except for the bird.  A narrow range will be in focus with the rest of the image out of focus.   
Picture
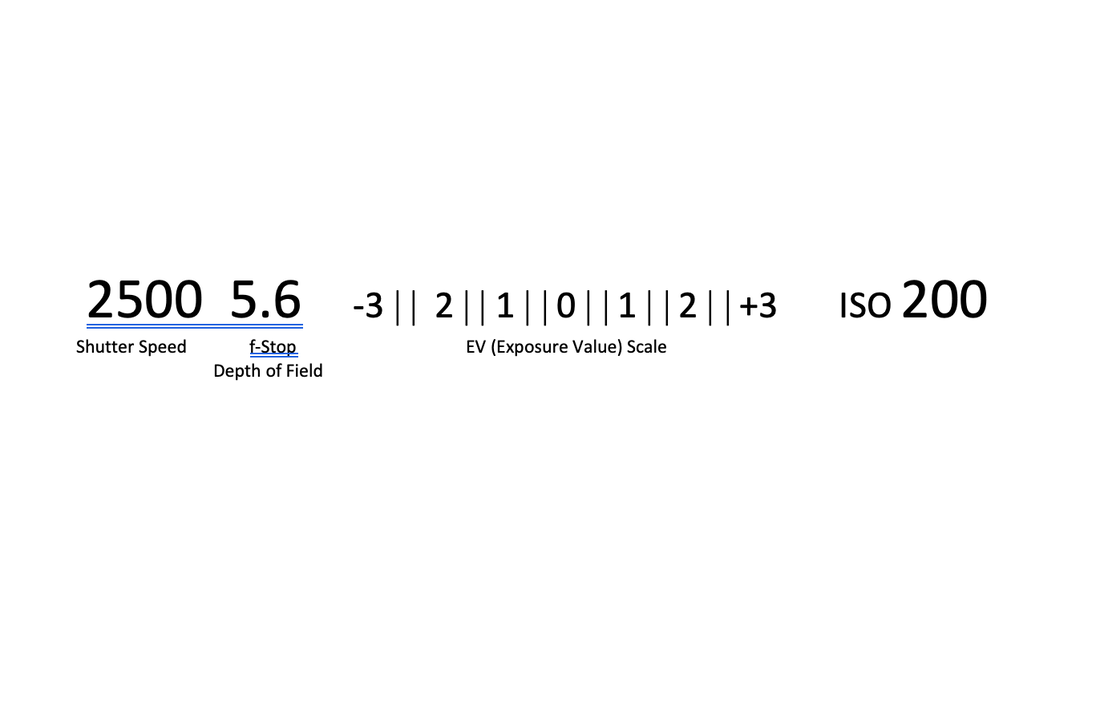
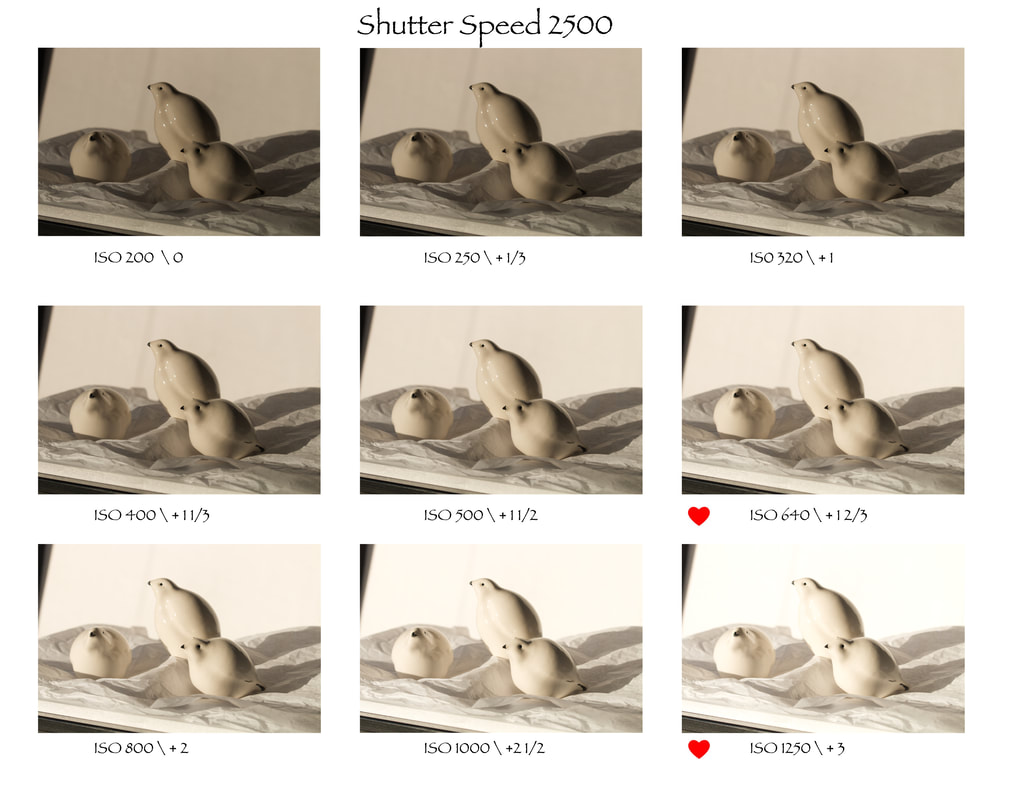
in the above image you can see each step that I go through in one place beginning with ISO 200 and ending at ISO 1250
Each ISO jump brought me into the "over exposure" range of the Exposure Value Scale.  

I want you to take a minute just to focus in on the shadows.  As you look at the range of images you can see how dark the cast shadows are.  Cameras tend to read the shadows as really dark compared to what our eyes can see.  I can have the bird at a perfect light reading but then the shadows tend to be too dark. If I then made adjustments for the shadow, the bird will end up way too over exposed.    The two images with hearts are the correct exposures: ISO 640 the ceramic birds are perfect and ISO 1250 is where the cast shadows are what my eyes were seeing.   

Often I will work with two very different images so that I can get the object expose properly but also the cast Shadow are the shadow area expose properly. 

At the end of the video I shared a bunch of images that I've taken from being overexposed, properly exposed to underexposed.  I would warn against photographing cloudy day when the light is really flat. On those days in the winter there is so much light bouncing around that it just flattened everything out.  You will notice it when you're walking as it tends to affect your depth perception.
​​
0 Comments

    Shawna Lampi-Legaree

    Yellowknife watercolour and acrylic artist Shawna Lampi-Legaree’s latest venture can best be summarized as capturing moments of beauty from the world around her.


    Archives

    March 2023
    February 2023
    January 2023
    December 2022
    November 2022
    October 2022
    September 2022
    August 2022
    July 2022
    June 2022
    May 2022
    April 2022
    March 2022
    February 2022
    January 2022
    July 2020
    April 2019
    March 2019
    February 2019
    April 2018
    March 2018
    February 2018
    November 2017
    May 2017
    April 2017

    Categories

    All
    Acrylic Painting
    Acrylic Painting 101: Basics For Beginners
    #AprilforArtists
    Art Deadline
    Artist
    Artist's Life
    Artquilts
    Art Show
    Being Brave
    Bird Paintings
    #birds
    Canadian Artist
    Colour Theory
    Flower Painting
    Flower Paintings
    Flowers In Watercolour
    Instagram Challenge
    Juried Show
    Mixing Paint
    Owls
    Pansies
    Photography
    #photography
    #ptarmigans
    Robins In Nest
    Watercolour Painting
    Youtube Video Lesson

    Mailing List
    To receive an update about new paintings, workshops and other art related news,  subscribe to my mailing list below. You can unsubscribe at any time. 
    Click here to subscribe
    Picture
DANCING RAVEN STUDIO (c) (867)920-4290  6 Bromley Drive Yellowknife NT X1A 2X8  2013 -2022                                                                                                                    CONTACT      FACEBOOK     YOUTUBE
  • Home
  • Blog
  • Artist
    • Press
    • Exhibitions and Awards
    • Recently Sold
  • Youtube Videos
  • Art
    • Birds
    • Flowers
    • Still Life
    • Eclectic
    • Art Quilts
  • MY STORE
    • Shawna's Society6 Store
    • Canvas Prints
    • Available Original Paintings