|
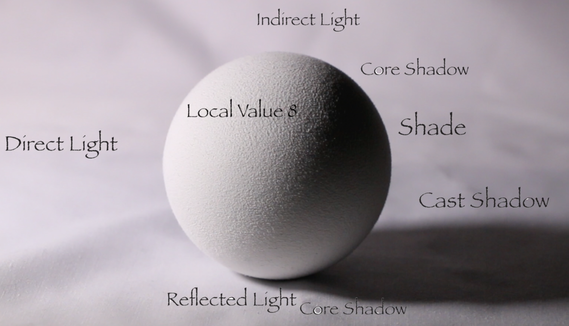
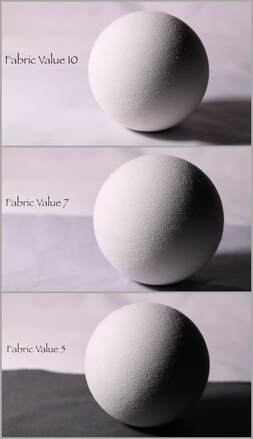
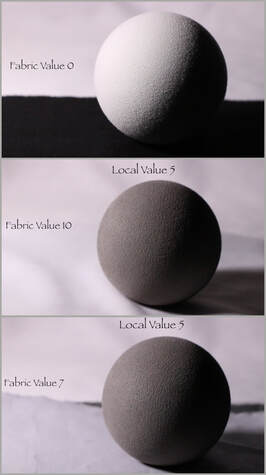
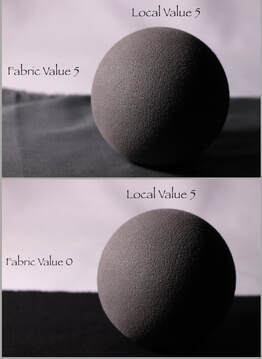
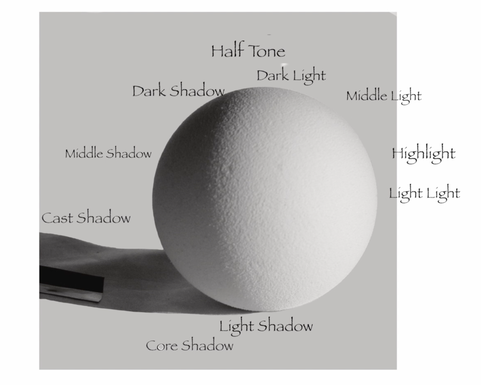
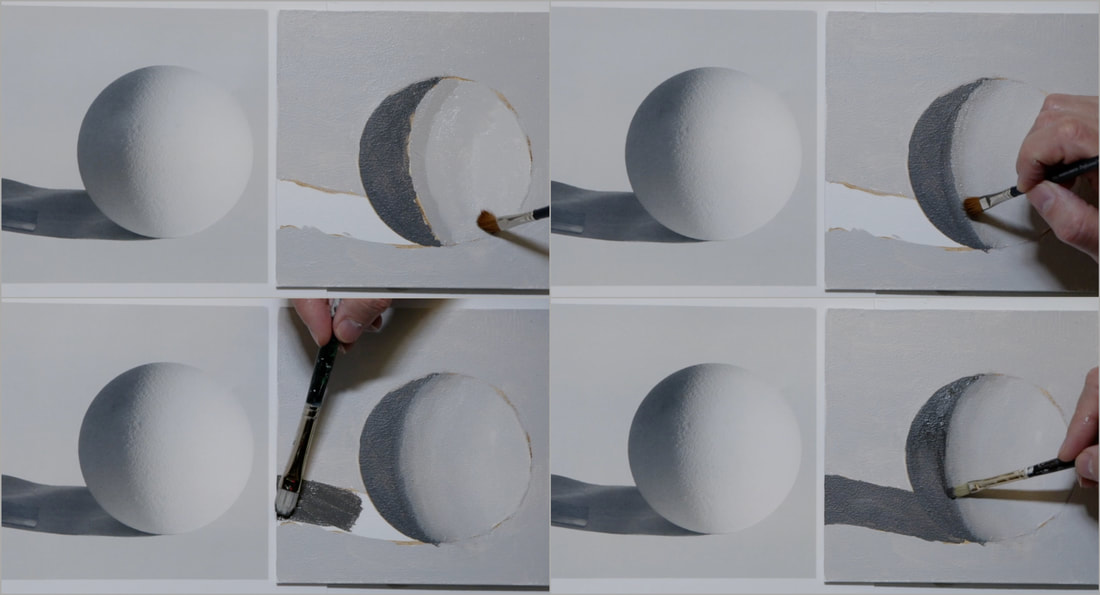
This weeks video has 4 parts: Part 1 - We look at a round object with the descriptive language we will use when thinking about light. Part 2 - We explore how a change of value on the ground impacts the light reflecting back into the object. We will be using two spheres with different Local Values. Local Value just means the value of the actual sphere without bright light on it. Part 3 - We examine the Modelling Factors responsible for creating the illusion of form on a 2-dimensional board. There will be the various values we will need to create. Part 4 - Is where we shall draw and paint the sphere from the image you can download HERE PART ONE - Light on a round object. It is important to remember the sphere has two ways to graduates in two directions: Top to Bottom and Side to Side. The sphere is a local value 8, meaning that the whole object is value 8 before there is light shining brightly on it. There is Direct Light on the left Side Plane. The Top Plane there is Indirect Light The right Side Plane is the Shade In the right Under Plane there is Reflected Light bouncing back off the ground. In the Shade area the darkest part is the Core Shadow. Falling behind the sphere is the Cast Shadow Finally, we have the occlusion or accent shadow directly under the sphere where the ground and the sphere meet. PART TWO – How the ground value affects a round object. In part two the value of the ground that the sphere is resting on will be changed. Each value change will impact the light distribution in the under plane and on the right side plane that is the shade side.
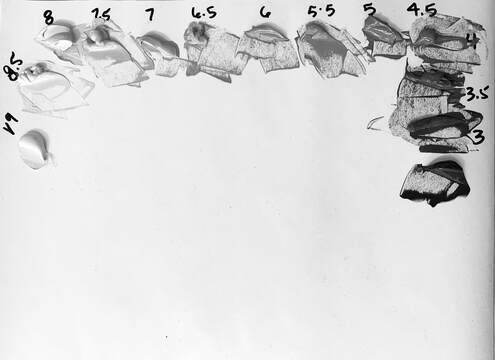
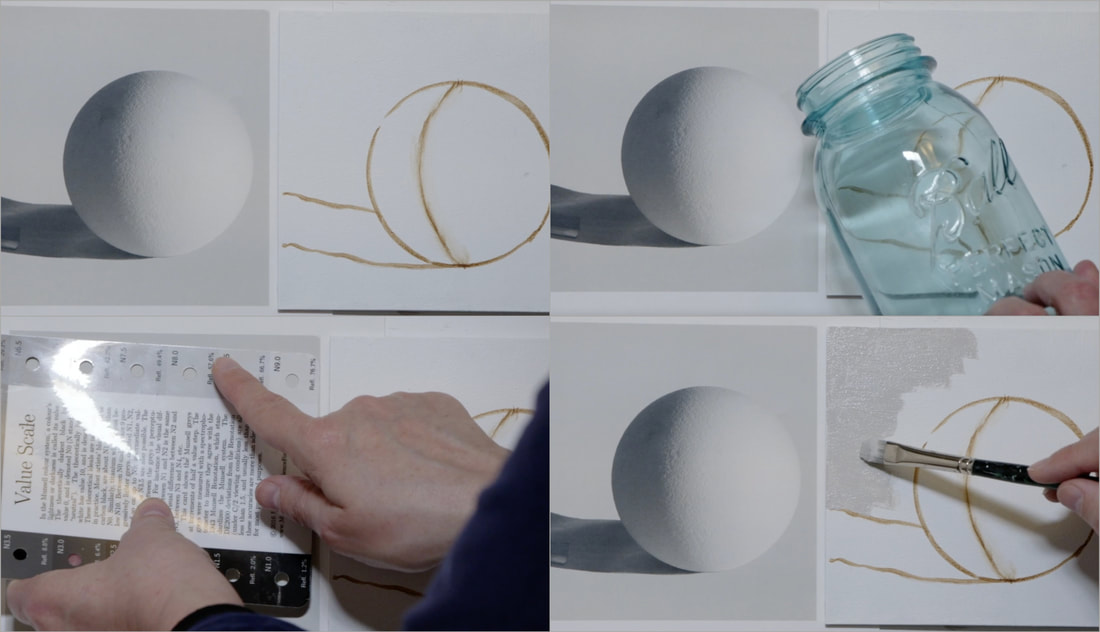
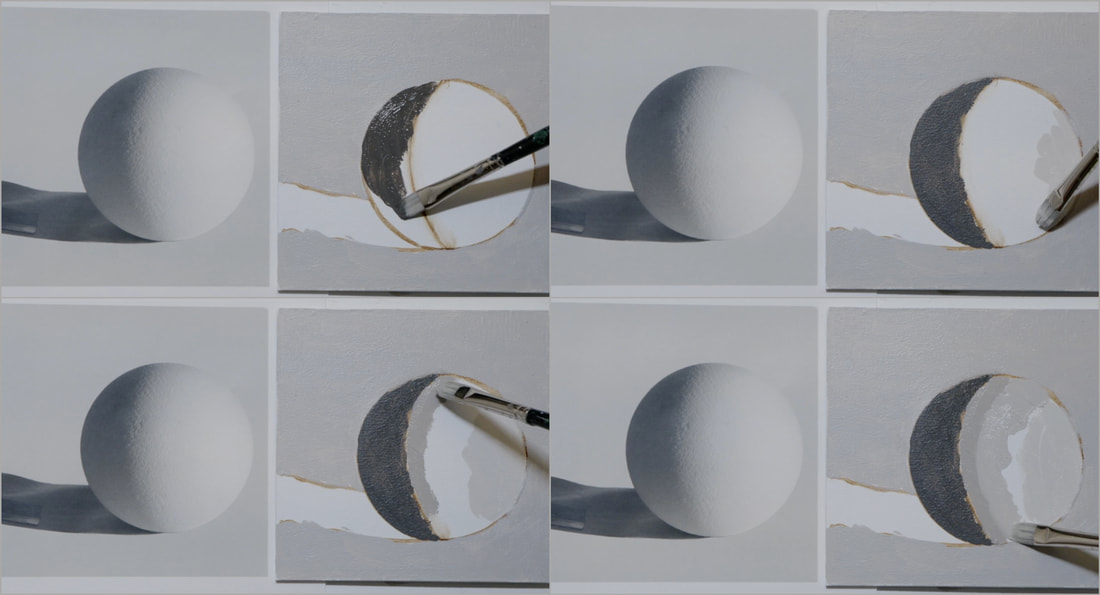
PART 3 – MODELLING FACTORS To create the illusion of form on a 2-dimensional painting surface you will need at the very least 3 value shifts. In this case we are doing a sphere so we will need 3 values for the light area and 3 values for the dark area. The Modelling terms we shall use consistently are as follows: The LIGHT area: Light Light - LL Medium Light - ML Dark Light - DL A transition value: HALFTONE: HT The dark SHADOW: Light Dark - LD Medium Dark - MD Dark Dark – DD Finally the last light factor: HIGHLIGHT - HL PART 4 – PAINTING THE SPHERE Now we are on to the final step....painting the sphere. In this part of the blog there are images that take us step by step through the process. Step 0: make the 1/2 step neutral value paints Step 1: Print the image at a proper printing place like Staples. Find the image HERE Then begin with the drawing. I used a Ball Jar to help me along as it was the exactly the right size! Step 2: Figure out the value of the background & do first painting pass on the background. Step 3: Decide the Middle Dark, Dark Dark & Light Dark Values. Paint the full Shade side in the Middle Dark value. Step 4: Decide the values for the Light Light, Middle Light and Dark Light for the light area of the sphere. Paint the three values on the light side, starting with the Light Light, then to the Dark Light along the edge of the shade side, in between paint the Middle Light value. Step 5: Soften the edges between the Light Light, Middle Light and Dark Light paints. You can do that by using the 1/2 step value that goes between...so if your light is Value 9 the next 1/2 step is Value 8.5 that will sandwich between Value 8 and Value 9 perfectly. Step 6: Here we use the Winsor Newton One Stroke brush to soften between the values. Add small amounts of paint and use the brush to move the paint around. Make sure that you take the time you need to until you are happy with the modelling on the light part of the sphere Step 7 - Create the half tone. In the video I used the Middle Dark and the Dark Light to create the half tone. I think that it may have been easier to use a Value that is a 1/2 step darker than the Dark Light Value. Give that a try. Step 8: Paint in the cast shadow. Step 9: Paint in the Dark Dark into the shadow side where you see the darkest value in the Core Shadow. We are nearing the end. Step 10: Put in the Reflected Light in the left underside of the sphere. Mine could have been just a little lighter, go with what you feel looks best. Step 11: Place the occlusion (accent or crevasse) shadow at the base of the sphere. This is the darkest part of the whole painting. Step 12: Paint the background with a second pass focusing in on cleaning up the edges of the sphere and its cast shadow. Remember to turn the board/canvas as you work along to make it easier for yourself.
0 Comments
Your comment will be posted after it is approved.
Leave a Reply. |
Shawna Lampi-LegareeShawna is capturing moments of beauty from the world around her. Archives
June 2023
Categories
All
Mailing List
To receive an update about new paintings, workshops and other art related news, subscribe to my mailing list below. You can unsubscribe at any time. |
